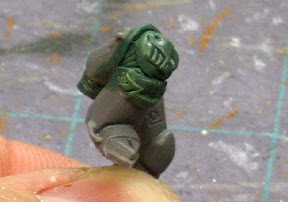
I got a request the other day for how I sculpt scrollwork on shoulderpads. Actually I got the request a few weeks ago and I completely forgot like an idiot. I apologize to the person who asked for it. I mentioned to them that it's something I've done before and it's not too hard to do really. The first time I tried something like this, it was for a Raven Guard Shrike conversion and it was located on his greeve and not his shoulderpad. The process is the same regardless of where it goes.
To show you all how I sculpt that particular piece or any scroll work for that matter, I made this series of diagrams breaking down the steps to it. It's not that hard to do really, you just need to make sure your cuts line up and you get your indentations in the right place.
This is about creating an illusion more than anything else. Part of it is done with greenstuff and part is done with your painting afterwards. Together, they make for a convincing illusion.
The mix of yellow to blue is 1:1 since I haven't found a need to go heavy one way or another. On a rare occasion, I'll go heavy with the yellow if I want what I sculpt to be a bit more flexible in the end, but I'd say 99.999 percent of the time I use equal parts of both. When it comes to tools need for this project, it's the GW sculpting tool and an X-Acto blade. Sometimes I use other objects like nails, paperclips, etc. to create certain effects if I need them and can't do it with my first two tools, but you won't need them here.

The first thing you do is lay down a thin layer of greenstuff where you want your scrollwork to be. It needs to be big enough that the entire scroll can be cut from it. We won't be doing any adding of material with this process, only cutting portions away.
You don't want it so thin that you can't make indentations in it and you don't want it so thick it looks odd. Maybe two millimeters or so should be enough to pull this off.
STEP TWO
This is perhaps the trickiest part... making sure the sections you cut away all line up. You'll cut away the upper corner on each side and the middle of the bottom.
By cutting away the upper corners, you set the width of the top portion of the scroll and how far the lower portions come out from underneath. Cutting the middle from the underside sets the height of the top portion of the scroll and how far the bottom portions fold under.
STEP THREE
Here's where we make this thing come alive. We're going to make two indentations (A and B). The first one (A) will form the outer edge of the upper piece of the scroll and then angle down and in towards the lower corner creating the folded portion.
The second (B) is going to create the bottom edge of the upper piece of the scroll. These two indents help us visually separate the top piece of the scroll from the folded part from the bottom piece of the scroll.
When you make your indentions, you're not trying to just cut lines into the greenstuff. Ideally, you'd like to be able to make a slight indentation and then fade it outward from there. If you look at actual examples, the "fades" work outward from the upper piece of the scroll work.
STEP FOUR
This shows what the piece should look like with some simple shading to help with the illusion and the optional triangle cut from the lower portion of the scroll.
Once you get the process down, you can do things like combine it with additional elements like I did for one of the Storm Warden Terminators I did last year.
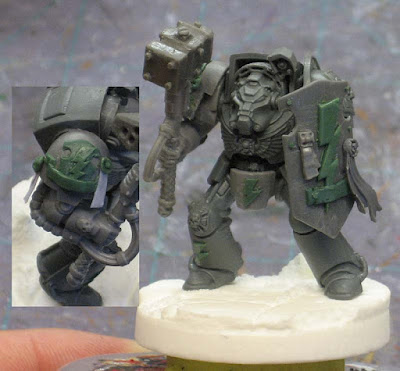
Thoughts on sculpting in general
When it comes to sculpting other elements, I first try and break them down into layers and then into simple shapes. I'll start with the lower layer, sculpt that, let it cure and then move up from there.
Most of my work is subtractive within each layer. The additive work I do is when I start a new layer on top of a previous one.
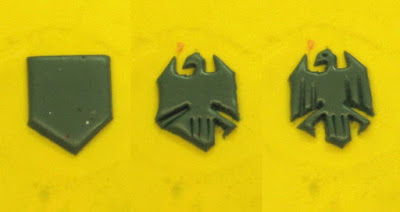
In this example, it's a single layer sculpt if you will that I end up cutting away small portions from around the edge. The addition of a few well placed indentations (for things like the wings) and you can make a fairly complex icon with ease.
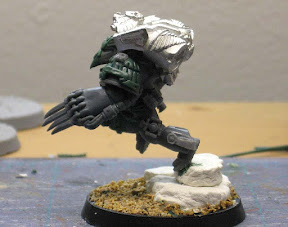
You can't be in a rush to get this done either. Once you've done what you can on a particular layer, you need to let that cure completely before adding more to it. This is important because you don't want to ruin you underlying work as you remove excess material from upper layers.
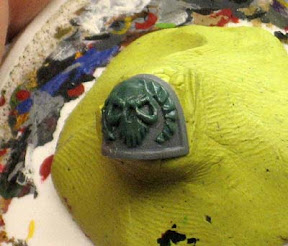
Once that cured, I went back and added the horns on the sides. The reason for this is so you can sculpt the skull and get it looking correct first. Then add the horns onto that. If you try and sculpt it all at once, you may run into problems getting everything to fit together in one pass.
If you have the same luck I do, you'd get the skull sculpted correct and then accidentally mess it up while trying to get the horn in place next to it.
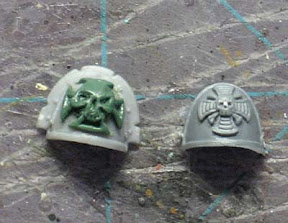
Sure, there is a good amount of detail in this and the scale is tiny, but if you take your time, you should be able to do this as well. Don't get in a rush and don't try to sculpt it all in one pass. Break it down into manageable sections and you'll do fine.
And nothing says you need to start out like this. Try your hand at something that is one layer with a little bit of detail. Get comfortable with that and go from there. You'll be amazed at how quickly you can assemble simple shapes and layers to get amazing results.
Make sure to check out these posts as they might help:
6 tips for sculpting better icons
