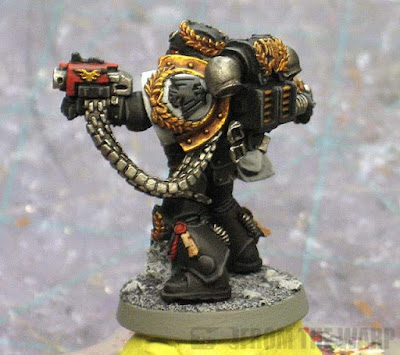
"How do you sculpt shoulderpad icons," seems to be one of the more frequent questions I get. Most of the time it's about a specific Chapter or icon. Since it would be impossible to explain how to sculpt each and every icon out there, I thought I might try and share some of the general guidelines I use when approaching the sculpting process... at least when it comes to shoulderpads.
I've touched on this topic here and there in previous posts but never really sat down and talked about some of the ideas behind the process.
It can be very rewarding to sculpt an icon or chapter symbol onto your hero's shoulderpad, it gives his shoulderpads some bulk, it stands out and it makes him look the part.
But, it can be incredibly frustrating trying to get greenstuff into any kind of shape that is recognizable as something other than an amoeba that might have landed on his shoulder and is covering up his personal heraldry underneath.

What kind of tools are you going to need?
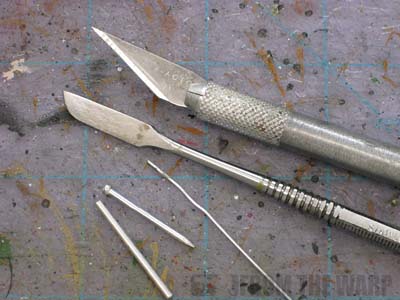
Outside of the basic kit of greenstuff, sculpting tool (I use the GW one), an X-Acto blade with a brand new blade and a bit of water handy, there isn't much else I use. If you stop reading at this point and just look at the pictures in the rest of the post, please take with you that you need to have sharp, clean blades on all your tools when sculpting. Nothing will undo your delicate work faster than and dirty, old blade with junk built up on it.
Aside from those, I have a few other things I keep for making the odd shape every now and then. A paperclip, a small nail (flip it over and press the flat head down into a tiny ball of greenstuff to make purity seals) and other things. Most of the time, you end up collecting them as you discover what they are good for.
Where exactly do you sculpt your icon?
The first question you come to is whether or not to sculpt your iconography directly onto your model or sculpt it onto something flat and then glue it in place. Unfortunately with shoulderpads, the curve of them can make it quite difficult to glue down the thicker shapes.
If you have something that is one layer, small in size (relatively speaking) or fairly simple, you can always try sculpting it flat on a piece of plastic, letting it cure, carefully peeling it away and then gluing it in place on your shoulderpad. It might be worth trying it this way first and if it doesn't work out, you can go directly to sculpting it on the shoulderpad itself.
I'd almost be willing to say that 9 times out of 10, it's not going to transfer over well enough to be convincing and you'll end up using that one as practice for when you go and sculpt it on the shoulderpad.
Sometimes you'll have to go directly on the shoulderpad since there are other elements involved and such. In this case, you don't have that option.
So how do you get started?
Once you have your greenstuff mixed (I do 50/50) and you've got all your tools handy, it's time to get to work.
If you're working on a piece of plastic in hopes that you can glue your icon in place later, make sure the plastic you're working on is big enough that you can hold onto it without fear of damaging your work.
If you're working directly onto a shoulderpad, make sure you mount it onto a piece of sprue or have it attached to the model if it comes that way. Anything so that you're not trying to hold onto the shoulderpad directly. Believe me, this will make it so much easier.
The first thing I do is put down a layer of greenstuff in the thickness I want.
Working on flat plastic is easier than a shoulderpad so we'll cover both methods for getting a consistent layer down to start working with.
Working on top of flat plastic
Starting with a ball of greenstuff, you press it down and then use something smooth (but not tapered) and roll it out of the surface. I use my X-Acto blade handle. Most of my paintbrushes are tapered so they won't work. The edges will get slightly flatter than the middle so the way I tell if I have enough working area is to cut a small portion away from one edge and look at the thickness of the greenstuff to see if it's the right depth and it's consistent.
The red arrow points to the edge of the greenstuff showing you the thickness. This way, you can tell how big of a work area you have and how thick it is in case you want to make it thinner.
Working on top of a rounded shoulderpad
The process is similar to the plastic, but as I get to the edge of the shoulderpad, I keep trimming away the excess greenstuff before I get an overlap. I press down and smooth out... then trim the edges to make sure I have a good thickness.
This is tougher to do since you have to use your judgement on how thick the middle is. Most of the time you can get real close or close enough that it doesn't matter for what you're sculpting.
The green arrows show you where I start with my pushing down and out to get the greenstuff and consistent thickness. The red arrow shows you the edge where I cut it away to check if it's the correct depth. Actually, I cut all the way around the blob of greenstuff in this case because I want to make sure my thickness is uniform across the surface of the shoulderpad.
Cutting greenstuff
No matter how wet or sharp your blade is, you will pull greenstuff as you cut it. It pulls ever so slightly in the direction you are moving your blade. For this reason, I always cut outward from the center of the design.
Sometimes you can minimize the pulling effect by using the tip of your blade and "chopping" into the greenstuff, but that's not always the best option.
The last method or technique shown in the pic above is making indents. You can do this with any number of tools. It's like chopping except you don't push the blade all the way through the greenstuff. Press it down far enough to make an indention as deep as you need.
Things you need to keep in mind:
Here are a few guidelines I keep in mind when sculpting smaller iconography. It's helped me get the detail I want without destroying my work as I go along.
1. DO NOT RUSH.
I don't put much in all caps, but this is perhaps the most important aspect of all. If you're in a rush, it's not going to turn out the way you want. You have to be patient when doing this kind of work.
2. The direction of your cutting matters.
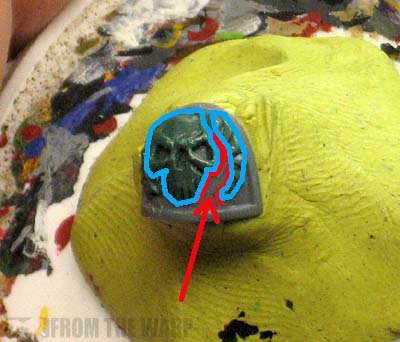
If you notice the red arrows in the pic above, they have pointers. When you are cutting into greenstuff like this, try and work from the center outward. There is a reason for this. If you do happen to pull the greenstuff slightly, it's away from the center and you can always trim it off the outer edge by chopping it away if need be. Cut towards the middle and you don't have this ability.
3. Work from a central landmark outward.
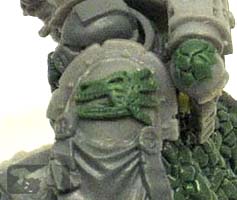
This means don't start with one wing or side and go around your object hoping everything is to scale by the time you get all the way around. In the case of the Raven Guard icon in the pic above, I started with the head so that I knew it will be centered and in the right place. Then move onto the wings.
4. Don't be afraid to start over.
Greenstuff has a limited working time. Sure, it's quite a while, but if you just can't get something right, don't be afraid to scrap it all and start over. I can't tell you how many times I do that. I actually had to do it today on a project... I had to start it over three times before I got it set the way I wanted (and I was working on a flat surface too).
5. Sometimes you can't do it all at once.
There will be times when you need to sculpt part of an object and then come back to it later on to finish it. I find this to be the case when I have deep recessed areas. I don't want to mess up one part of my sculpt while I'm working so close to it on an adjacent piece. I'll wait until it's cured and then go back and finish the outer lying portions.

This guy is a perfect example of waiting and doing it in two portions. The skull was sculpted first and then left to cure. After that, I went in and added the horns. The space I was worried about was the deep recess between the underside of the horn and the side of the skull. I didn't want to destroy my skull while trying to get the horn into position.

Get the shape of your object first. Then add your texture in there. Not the other way around.
The trick is to get the correct shape and then add your texture in at the end (only as much as you need in the space available) to really make it look convincing. You'll be surprised at how little it takes because you won't have much room left anyway.
And as one last note, you don't have to sculpt every little detail. That's right, you do not have to put it all in there. There is some detail that can be added by painting it in there. So don't feel like you have to get something in particular into your sculpt or it just won't work.
This post here about hair and tabards is the perfect example of adding detail with paint and not by sculpting.
In summary:
Sculpting iconography onto a model can really add some depth and character to it. It takes patience, clean tools and following a few simple guidelines. Working with greenstuff is one of those things you can't really learn by reading about. You have to do it. The only way you're going to improve when it comes to this aspect is by doing it repeatedly.
It's a long road. I've been at it for a few years now and I'm just getting to where I can sculpt the majority of things I want. I can tell you it opens a whole new world of modeling though.
Make sure to check out these posts as they might help:
Sculpting shoulderpad honor leaf laurels (Standard Bearers)
