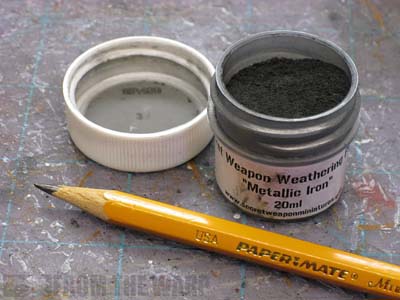
The other day I talked about using metallic weathering powder to achieve worn down and chipped looking armour plates. Today's post is a follow up to that one and we're going to look at the metallic powder's close relative, the pencil.
Let me start by saying I'm using nothing more than a regular #2 pencil. All I've done is sharpen the point so I have the most possible control in my application.
The difference between powder and pencil
With the powders, we were taking more of a drybrush approach and covering areas and not so much specific edges or spots on a model. This is where the pencil steps in, if the metallic powder is a blast weapon, the pencil is our sniper rifle.
Coming off my previous experiments with powder, I did keep one thing in mind. The difference between working over dark colored armour and light colored armour.
So let's start with darker colored armour
Again, like the powder, the pencil can be applied directly onto your model without having to worry about it not looking "right." Since we have a good amount of control in our application, we can get it along the edge without the extra we had when using powder.
We also have the ability to add small scratches and such. This is a small feature we could not do with the powder.

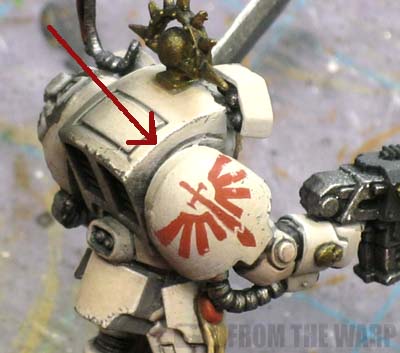
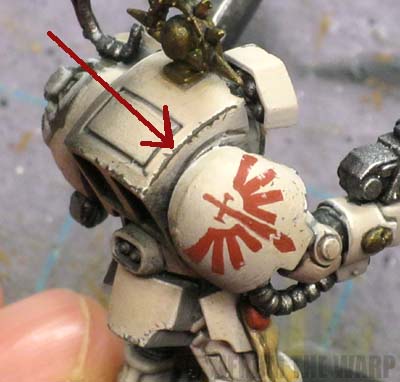
Here's what I'm talking about. I took this model and you can see how he looks on the left hand side without any weathering on his forearm and hand armour. On the right side, you can see how I used the pencil to make the armour plate edges look worn down.
Working over very light colored armour has similar problems
Using a pencil directly over light colored armour creates a new kind of problem. It not only looks "wrong," it can be lost on the model. The reason it can be lost is because of lighting. Since we are using a material (graphite) that is reflective, the light only "highlights" the portion in front of us as the light hits it. The rest of it looks as though it's just a dark line along the edge.
So you may have a whole edge "penciled," but it looks as though only a small portion is because of the lighting you're looking at your model under. This is good and bad. Good because it adds a bit of realism to our highlights and bad because we can no longer apply our pencil directly onto light colored armour since it changes based on the lighting we are viewing it under.
You can see how the reflective quality becomes important in making a convincing illusion. Using silver paint avoids this problem since it is always reflective regardless of where it may be located on the model under any kind of lighting. But we're not using paint at this point, we are looking to expand what we do in terms of weathering.
How do we get around this issue then?
Easy enough. all we need to do is add in the effect of the light colored armour being chipped away and revealing the primer paint coat underneath. Then we add the bare metal spots after that.
I do this by taking the GW Foundation color Charadon Granite and painting it on my model where I want the damage to be. I thin it slightly and apply it to the edges of the armour I want to have "worn down." Then I take my pencil and go in to those areas and add a few spots where it's been worn down to the bare metal.
Here's the Charadon Granite applied to the edge of the Terminator torso. Using my paintbrush, I applied a very thin line of it along the whole edge. I used the tip of my brush to expand the damage in a few spots.

The trick when putting the base down for your weathering (in preparation for your pencil work later on) is to make sure you get a thin line. Since you are painting a dark color over a light one, it's going to stand out. I hold my brush at an angle like this so I catch just the edge of the armour plate I want to weather.
AND... you hold your pencil in the same fashion as you did your paintbrush. By holding it and using the side, you can focus your metal areas and keep them inside the darker area that was just painted on.
The completed weathered look on light colored armour
Here's what it looks like with the Charadon Granite base and the pencil applied to few spots along the base color.

Some final thoughts
I have not mentioned varnishing models once you apply your pencil or powders for that matter. I suspect nothing will change with the pencil application, but there is always the chance that the effect may become a bit muted as can be the case with some weathering powders.
Of course you'll have to do a little experimenting to see what works best for you.
Make sure to check out these posts as they might help:
Making your iconography look weathered as well
Weathering with sponges
