Zenithal highlighting on models can be a huge and somewhat complex topic and it's with some reservation that I'm posting this whole "tutorial." I don't consider myself an expert by any stretch of the imagination, but hope to share what I know about the topic with those folks in the same boat as me.
This is not an exhaustive discussion on the topic by any interpretation either. There are painters out there who know much more than I do and there is much more that can be discussed when getting into something like this. All that being said, I'm hoping this post will help folks understand some of the basics with zenithal highlighting and give them enough of an understanding to try it out for themselves if they want.
I'm not going to get into the actual process of painting the model in this post, but instead I'm going to try and keep focused on the ideas behind everything. How you physically paint the model is important, but you need to understand the theory and why the paint goes in certain places and not in others first. Still with me? Let's see if we can remove some of the uncertainty people have with trying to paint using this aproach.
Getting started, what is zenithal highlighting?
I would guess most of us started out with line highlighting our models. It gives them a certain kind of look and feel. Zenithal highlighting is another approach to highlighting a model that gives it a completely different look and feel. It makes it appear as though the model is being lit from a light source directly overhead of the model. It could be said that this is a much more realistic approach to highlighting a model.
It creates areas of strong highlight and areas of shade on a model that can bring it to life in a way that regular line highlighting cannot do. In essence, we are duplicating the effects of sunlight as though it were the middle of the day and our model was standing outside.
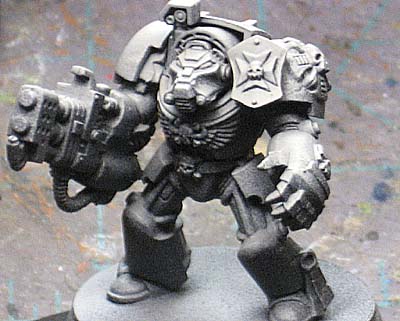
For my example, I'm going to use the Space Marine Terminator Librarian I did a while back since I had the presence of mind to take some pics as I went along.
For the purpose of the tutorial, I'm going to focus on his armour and not on all the smaller elements on him. These too would get the same treatment as his armour in the end and the exact same ideas/theories apply to all of those parts as well.
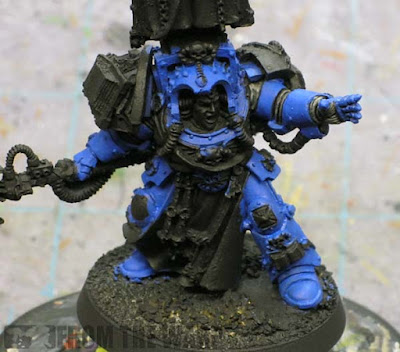
I have this guy basecoated with GW Enchanted Blue. Over a black prime, it took a few thin coats to get a nice, smooth finish on him.
Where does the light come from and where does it go?
With zenithal highlighting, we imagine the light source being directly overhead. The orange arrows give you an idea of how the light might "fall" on the model. If we look at the model from the top down (the right half of the picture) we can see the actual exact places the light would hit on the surface of the model.
And we come across our first problem.
There isn't much model to highlight if we place our light source directly overhead.

The way we fix this is by making our light source a bit larger and less like a flashlight shining down from directly overhead.

Think of it like this... instead of one large light shining straight down from over his head, we have a ring of lights that shine down and slightly inward from over top of him. The red line above would be the "ring" and each orange arrow would be a smaller light that shines down and inward. This effect goes all the way around him too.

What this does (widening the light outward like this) is open up the surface areas of the model to more highlighting. As you can see by just looking at the model itself, there is much more area to be highlighted as opposed to our directly overhead (narrow source) look like we originally had.

Now widening the light source opens up some additional surface area, but it also means you need to pay close attention to what is highlighted and what is not. It doesn't take much to kill the effect. Like OSL, you need to follow your map of what should be highlighted and what should not.
Mapping out the overhead highlights
Once you have an idea of what gets highlighted and what doesn't, you make a mental note in your head and then start blocking those areas out on your model. In my case, I simply used my base color again since I'd applied a wash to the whole model to darken it slightly.

You can see in the photo above that I've "mapped out" the highlights in orange on the left side. This is where they should go in theory. The right side shows what it looks like once you actually apply the paint. Getting your highlights to look correct is going to require some blending so you don't have abrupt breaks between each highlight color.
This could be done by wet blending or layering of your colors. Again, we're just looking at the theory here and not any number of paint application techniques you could use.
Highlighting the overall shape and not the specific part
With zenithal highlighting, it's important to keep the overall shape of what you're highlighting in mind. Do get caught up in what exactly it is. By that, I mean don't get caught up in highlighting an "arm." Think of it more like a cylinder or tube that is in a particular position with light falling on it.
The photo below shows you what I mean by this. If you look at his arm, it could be easy to get caught up in the details and forget that the main shape is a horizontal cylinder. The highlight on his arm will be brightest on the top of the cylinder and then fade to dark as it moves around each side towards the bottom.

The same thing applies to his outstretched leg (another cylinder at an angle) as well. Starting at where the light hits it along the outer edge, you move into shadow as you come around the front towards the inside. The same would apply as you move in the opposite direction around back. Add to that you need to consider what elements overhead are blocking any light.
Following the light as it moves over the model
And for one last look, I'm going to go over the completed Librarian and mark off some of the highlights and shadows applying what we've covered so far. Remember, the light comes from above. Even though we have a wide light source and not a narrow one, the light still comes downward in terms of direction.
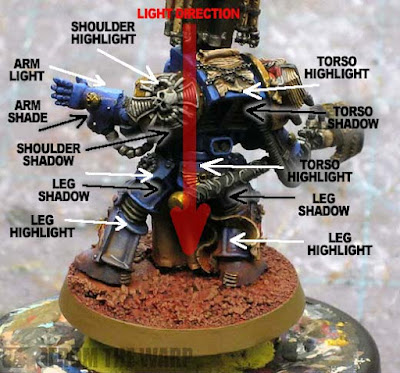
Starting on the left side of the picture, we have his outstretched arm. Like we mentioned earlier, it translates into a cylinder in a horizontal position. The top is highlighted and the underside is left in shadow.
His shoulderpad really emphasizes the effect since it is turned due to his arm. Only the upper most portion is highlighted and the lower portion is left completely shaded. If we were line highlighting, it would be a completely different set of guidelines we'd be using. Sometimes this can throw people off when doing this technique. It can be easy to keep highlighting since we're used to hitting ALL the raised surfaces with line highlights. In some respects, this can be quicker than line highlighting a model since you're not highlighting everything... it's only the upward facing surfaces of the model.
The left leg has a bit of a highlight on the hip plate that sticks out followed by a shadow that is created by the very same hip plate. Then we move back into a highlight since his leg is sticking out from under him.
Moving down the right side of the picture, we have a strong highlight on the top of his torso. His back is in complete shadow since it is underneath and angles back inward. Where his center plate sticks out, we have another small highlight again. As we move down his right leg, the whole back side of his thigh is in shadow since it is under his arm and bent. No light is going to get in there. It's not until we get to his lower right leg around the heel where it is sticking back out that we get our first highlight on it.
A few last thoughts
So there you have it a quick look at zenithal highlighting and some of the ideas or theory behind doing it. The whole trick to the effect is getting your lighting and shadows in the correct places. You need to be fairly careful in mapping out where exactly the light falls on your model in order to make convincing.
Once you have it mapped out though, it's just a matter of painting those selected areas. This idea can be applied to regular line highlighting as well. Keeping that same overhead source in mind, you can apply line highlights to a model in just the areas the light would actually hit it. I do this with my models all the time. It helps reinforce the feeling of being lit by an overhead source and I don't have to line highlight everything on the model either.
And for those interested, here's the completed Terminator Librarian.
Make sure to check out these posts as they might help:
Line highlighting made simple
