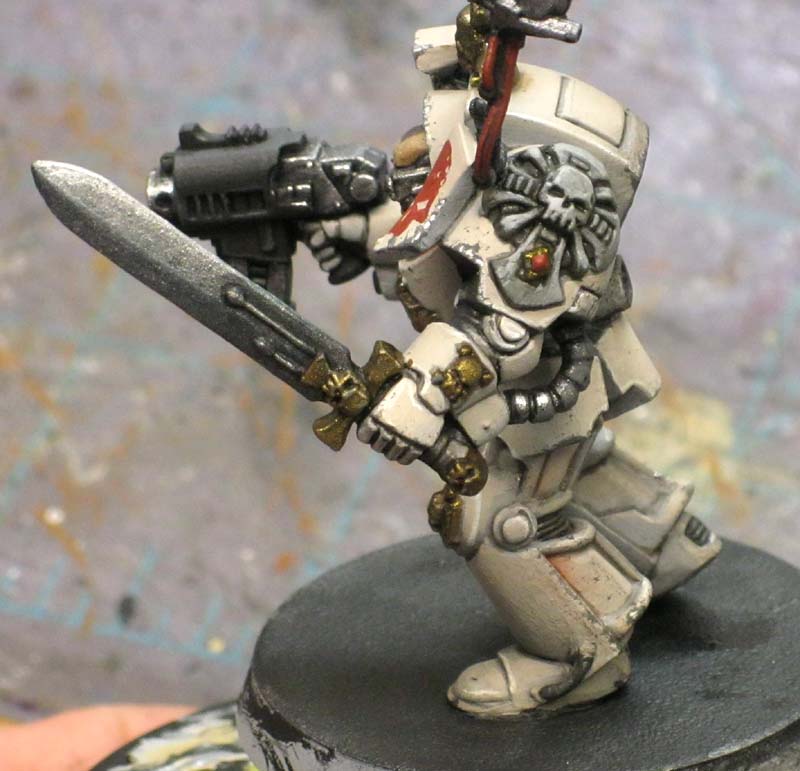
One squad in full bone colored armour please.
Sounds easier than it is. After trying a number of methods to get a nice, muted, bone color for the armour that wasn't just copying something else out there, I came up with this.
It's fairly involved, but I think the end result is quite nice.
Keep in mind this is just a test model, so it still has some mold lines and not every detail is painted in there. I would stop painting once I knew I could get the look I wanted. This might be more of a practice model and not even a test.
My previous approach to painting bone colored armour
Most of us end up with shadows that are warm in nature (when they should be cool) and all the other problems that come with trying to paint these super light colors.
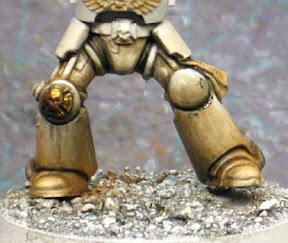
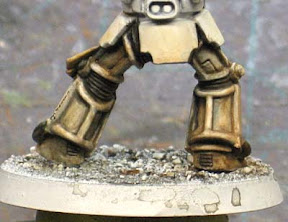
I do the same thing. With this project, I had to see just how far I could go with getting some nice results and overcoming the problems we all face. These last two pics of the legs on the right here are a previous method I use to paint white/bone colored armour.
With my previous approach, I started with straight white, added a bone wash to the model and then used a series of washes to create the shadows and weathering as I went along. It lacks the depth/shadows in the recessed areas my newest method has.
How I painted the armour this time around
Like all things I paint, there is a specific sequence I follow. Starting from the inside and working outward on the model. In this case, I also started with all the pieces (arms) glued in place. It helps me find the shadow areas quickly and I work around them.
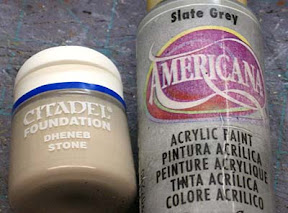
I start with priming my model light grey (it's automotive primer). I've also got a light grey paint (in a bottle) that is the exact same color/value so I can clean up any missed areas. It is Slate Grey by Americana. With the model completely primed/basecoated... the real work begins.
A quick wash of Devlan Mud in all the recessed areas is the first thing. You could put it over the whole model, but I prefer to exercise a little more control and it makes it easier to clean up in the next step too.
It's slightly thinned so it flows nicely, but you need to make sure you hit all the joints and such with the wash. I didn't do so well on my practice model and the places you miss in the beginning will have to be touched up later on which will be harder to do.
The end result is your darker areas are a combination of a cool color with a dark brown hint. It makes the light grey look more like a dark grey.
Wet blending all the armour plates

One happens to be warm and the other cool.
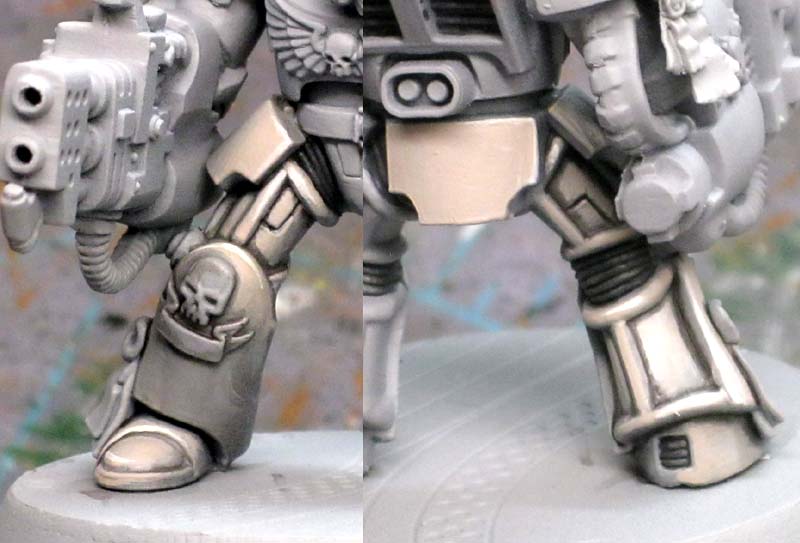
Since the model has been washed, you're just working on the faces of the armour plates now. Where the light hits it, you apply the Dheneb Stone...
Where there is shadow, you go back over it with the original
Slate Grey color. In between... you wet blend. This takes forever.
I use a zenithal type approach to the lighting. I imagine a light source overhead and look at the model from that perspective to see where the light would fall and where the shadows should be.
Once you're done with the wet blending, it's a matter of line highlighting the key areas with P3 Menoth White Highlight. This is really done to make some of the more prominent edges pop out. You're not hitting everything with this.
And to be honest, the model looks silly when you're done with this step. Almost to the point of scrapping it. It's a good thing I kept going to see how he would look with all the other elements in place.

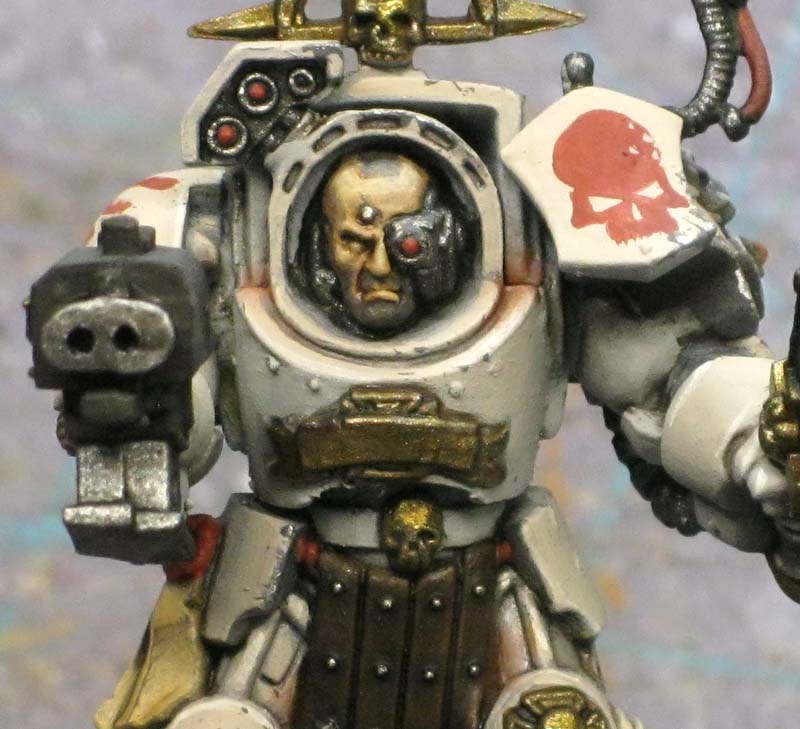
Everything else
After you get the armour done, you're more than half way there. Now you need to paint everything else. And you can use your standard formulas here... whatever you do for metal, whatever you do for red, etc.
You do need to be careful though that you don't get any paint onto your finished armour. It's enough to give you a heart attack when you do as you frantically try to get it cleaned off before it dries. I kept mine somewhat muted in the end.
And last but not least, some wear and tear
With the model painted, I went in and added some wear and tear to the guy to make him come alive. I went a little heavy here and I'd need to scale it back on a higher quality model. Like I said, this was practice and applying weathering to a light colored model is completely different than applying it to a dark colored model.
Yes his armour is white and yes he takes care of it, but this is 40k...
The chipping along the armour plate edges is done with a sponge, but I'll be going to brush for any future applications so I can control it getter and scale it down to something more practical. This is a bit over the top here. In the places that are really worn down, I go back in with some silver to show that it's even down to the metal on the suit.

Lessons learned while painting this guy
1. Wet blending takes forever to do. It's a gorgeous effect, but so time consuming. Even with the weathering covering up most of it in the end, it's still a key part to this model. It just adds so much more to the look of the model.
Maybe it's practical for a Deathwing or Grey Knight sized force of 10 guys, but not much past that truthfully.
2. Weathering powders can be erased with water. As I was weathering the lower legs, the powders picked up too much surface texture (my fault for applying it too heavy) and had to be removed. A bit of water and some gentle scrubbing with a small paintbrush removed the powders and created a wash that flowed into the recessed areas for effect.
3. The details matter. The armour may be painted great, but it's all the other small things that carry the model. How you paint the gun, the sword, the gold trinkets, etc. Make sure you have a plan for them too.
4. High contrast will help. Yes, the armour is bone colored, but the shadows are cool (not warm) and in the deepest areas, they are close to black. This kind of contrast really makes the model seem alive. It can be tough to get such a huge value range in such a small area, but it's worth it in the end.
5. Scaling up. I'm not sure how well this would work on a tank with it's larger panels. A dreadnought shouldn't be a problem, but it might take an airbrush to get the smooth blends on a tank.
7. You can see how this model/version looks so much more polished and complete than my previous ones. I think that's due to two things. One: The wet blending and detail work. Two: The addition of weathering over the finished model. I literally had the model all done and then went in and very careful gave the armour a worn look and brought it to life.
Make sure to check out these posts as they might help:
Full tutorial: How to paint Deathwing slow and complex with amazing results
How I wet blend colors
Some of my thoughts on weathering powders
