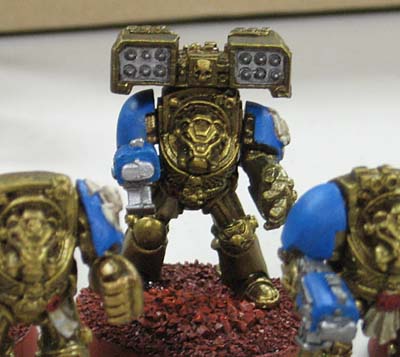
These guys belong to a friend of mine. They are his own Chapter and he sat down the other week to ask me what I thought could be done to them to make them look "better" and more "finished." Adding freehand icons and decals to models can be easy if you take your time and break them down into smaller elements.
I've covered this kind of thing a couple times already, once with a Lord of the Rings model and just recently with some Imperial Guard. If I've said it once, I've said it a thousand times, it doesn't take much to get a nice looking army.
In this case, I'm going to get into freehanding and decals.
With my armies, I prefer to do freehand work. I will say that some things lend themselves to being sculpted much better than being freehanded (and the other way around is true too). I've mentioned painting freehand shapes before, but I think it's worth going into a bit more detail for this example to show you just how easy it is to do.
One of the things we talked about (after covering the wash and highlight steps he would be doing to his models) was the creation and painting of a "cool Chapter symbol." And when I say cool, I mean easy to paint on a bunch of models. This was one of his biggest concerns, and rightfully so, choosing a Chapter symbol can be tough, painting it on 20 to 30 Marines can be impossible. Unless you know what you're doing.

Now there is the route of using decals, there are tons of them out there and you can always make your own with your own decal paper. As long as you take the time and apply them correctly, you shouldn't run into any problems.
My experience with decals is somewhat limited having only applied them to my Black Templar army, but I will tell you that I've found it important to do a couple of things...
1. Always use a new, sharp blade when cutting decals out.
2. Trim as close to the actual image of the decal as possible.
3. Take your time!
These decal tutorials from fellow FTW Bloggers should help:
Decals: Getting the "painted on" look, by Pit of the Oni
Decals: Using Microsol and Microset by Incunabulog
Decals: Using Microsol and Microset by Berks Warhammer 40k
For the example here though, my friend ended up going with a chalice and decided to freehand them. Actually he wanted a lightning bolt because he thought that might be easier to do, but I convinced him the chalice was silly easy to paint.
And here's what I'm talking about...
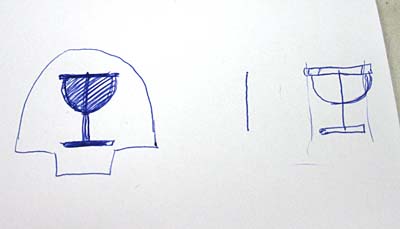
The sketch I did to show how easy it would be
If you were to try and paint this (a chalice) in one pass as one large, black object on each terminator shoulderpad, who knows what you would end up with each time. I think this is what scares most people away from freehanding, decals and details like this, they think they have to do it all in one pass.
Again, the trick is to break it (freehand painted icons) down into manageable and more importantly PAINTABLE shapes that when combined together, create the final shape you want. You don't have to paint a chalice when you can break it down into three straight lines and half of a circle.

We start off with one vertical line. The top of the line will be the top edge of the chalice, the bottom of the line will be the bottom of the chalice. Make sure to place your line in the center of the shoulderpad. So far so good right? It's just one line.
Next, we add two horizontal lines, one across the top and one across the bottom. These are the respective ends of the chalice. The top line is slightly longer than the bottom line.
And finally, we add our half circle to the underside of the top horizontal line. This is the actual "cup."
You can go back and thicken up the lines or add some slight curves to make it fancy, but you don't need to. You could go back and adding some highlights to the chalice too, but again, not necessary.
Like we said in the beginning, we're just looking to add that extra little detail to make our models stand out. Adding a simple detail like this to a "tabletop" painted army really makes them pop and takes the overall quality up a notch.
I managed to get some help from misterjustin with weathering decals. Because once you get your icons (whether they be decals or freehand work) on your model, you don't always want them looking brand new on your war torn veterans.
The post on weathering your decals is right here.
