I was talking to someone the other week about painting and thought I might share part of our email exchange. What always seems to come up is how hard it can be to paint black armour.
I disagree completely. There is no color easier to paint.
The most difficult thing about painting a black armoured model is painting everything else on the model.
Here's what I mean.
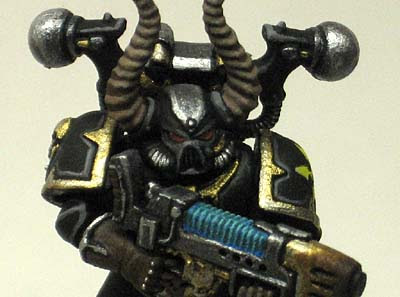
Since black is at the far end of the spectrum, there is no more shading you can do to it. Add some highlights and that's it. But that's not much to do to a model is it? The real difference is in the details. Those are what carry the model and make it look convincing.
With just about any other color (except for white), you have the highlights and the shadowing to help make the model look convincing. With black, you don't have that range. You end up being forced to rely on the other details to bring the model to life. Scrimp on those and your model will look lifeless, no matter how well you paint his black armour.
But this is all discussion. Painting black armour can be easy to do really... just make sure you go back and paint all your details on your model afterwards if you really want it to work.
As for actually painting black armour though, here's what I do:
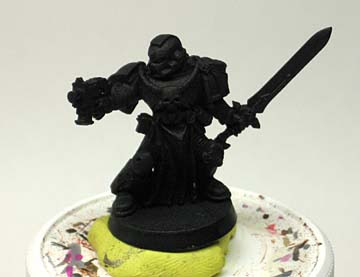
Prime and basecoat him black. The reason I basecoat him black after priming him black is so that when I go back to touch up any mistakes, the blacks match (sometimes pot paint and spray primers don't match exactly).
Of course I just finished a big post about trying other colors than black when it comes to priming but this would be the exception.

Add the first highlight to the edges you want. I do the majority of the hard edges on the model.
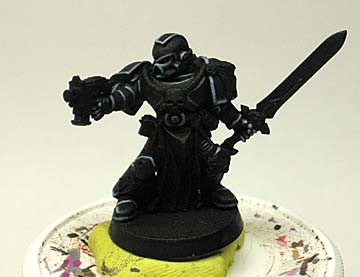
Add the second highlight to only the uppermost edges. I'll only pick out the high spots on the model for this highlight. For this example, I'm using a high contrast approach so you can see where I've highlighted the model a little better.

After you've got the highlights you want, you can go back and clean up the edges and really sharpen up the look of your highlights by taking your basecoat and going back around the edges of your highlights. This will give the model a real "finished" look when you're done. The top half of the photo is before cleanup, the bottom half is after cleanup.
Some people like high contrast, some like subdued, some like two highlights, some like just one... pick your colors and number of highlights as you see fit but the process remains the same.
I highlight certain areas only because I like the end result, where you choose to add or leave out your highlights will ultimately be a choice you make based on what looks good to you.
If you want to see how this (painting just his armour) ties in with painting the whole model and what gets done in what order, that tutorial can be found here.
And keep in mind, this isn't the only way to paint "black."

Fellow painter Tim Davis (The Vanus Temple) has a completely different method for painting black that involves the use of a dark grey undercoat and a series of washes which can be found right here.
This technique gets into using colors other than black and white to prime.
