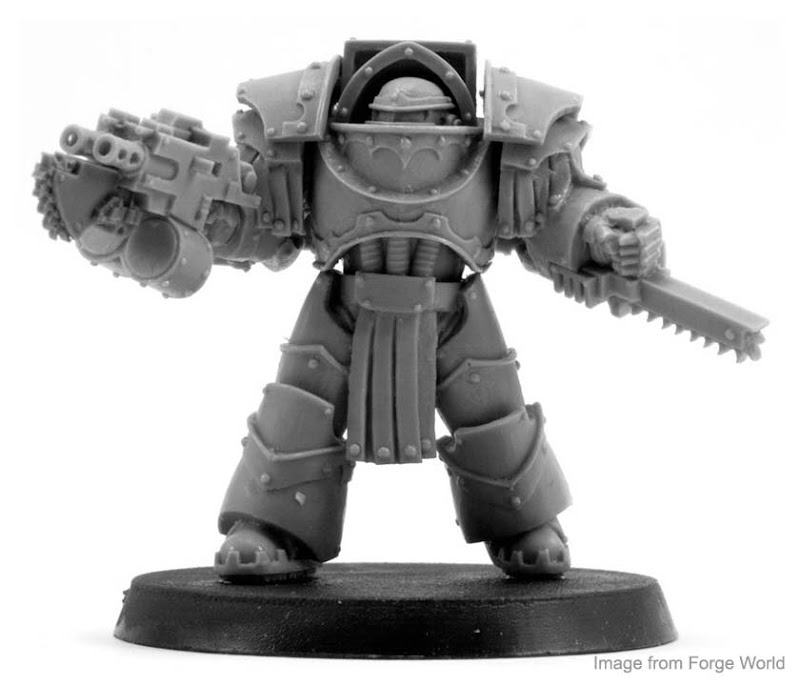
As soon as I saw these guys, I wanted to see if I could mimic something close. I've done some previous Pre-Hersy style armour before, but nothing this complex. I wanted to see if I could take what I'd done before and expand on it to get something that would be passable for Cataphractii terminators.
Let me back up a second and say that this guy is more of a test model to see if it could be done in the first place. He's got some really rough edges and could definitely use some more work overall. But... the idea is there and with some refining, this could produce a fairly respectable conversion I think.
So let's look at what I did and what can be improved.

This guy has had a few things done to him. From truescaling him up slightly (truescale tutorial can be found here) to bulking out his legs and then adding about a million extra rivets. I took what I saw as some of the key elements and tried to incorporate them into my conversion.
Starting at the top and working down, I removed the sensor array attached to the head piece. Far too advanced for this MK armour. The chest piece would not normally be sporting the eagle either. If I were to make an adjustment here, that would be shaved off and some basic trim and rivets would be added in its place.
I opted to go with a bare head since I did not have a suitable MK helmet I could use. I know they are out there as thrid party bits, I just didn't have one on hand. I suspect with a bit of filing away, you could get it to fit in the collar opening without too much trouble.
I added the neck armour but kept it simple and brought it straight across. The addition of a few rivets tie it in with everything else. An improvement would be to add some trim and match that up with the trim on the chest armour.
Nothing was done to the arms other than to change the shoulderpads. Instead of making my own, I cheated and used some from Maxmini that I had lying around. I could have made my own, but I was in a converting frenzy and went with what I had. I like these shoulderpads and buying them instead of making them can save you a good bit of time overall. The only downside is that you have to pick from the styles they have (of course that's true for any company out there). One issue I did run into with these was how they fit over the arms, I had to shave the shoulders down slightly in order to get the shoulderpads to fit correctly. Not a big deal, but not a hassle you want to deal with.
I added small leather straps using cardstock from under each shoulderpad and attached rivets to the ends. The tight fit of the shoulderpads made it tough to get the straps up under there and I spent some time fiddling with them to get them in place.

Like I mentioned, the torso has been extended by 2mm as well.
I absolutely love that little conversion.
The legs or at least the upper portion (thighs) have been bulked out. This proved to be a little bit of a challenge, but not as hard as I thought it was going to be overall. I had to cut away the side hip plates and I added a giant blob of greenstuff that I worked around the thigh. I tried to keep any rough areas on the inside where they wouldn't be seen as easily. The hardest part was getting the little tab that extends upward. I had to push the blob of greenstuff up and let it cure in place before cutting away the shape after it cured.
This little tab piece is not that big of a deal in the end since his arms block most of that area anyway, BUT it does help tremendously with bulking out his waistline and keeping the model looking "correct." I think the bigger thing here is getting rid of the hip plates and bulking out the overall thighs. That one change alone makes a huge difference in the final look of the model.
I gave him a leather strap half tabard which was super easy to do and I'll be covering in another tutorial. It's silly how easy it is to make one. I added some rivets to the bottom of the straps as well. The half tabard does two things for the model, bulks him out, and even more importantly, hides some imperfections which is great on projects like this.
The lower portion of the legs have had additional armour plates added to them to give them a different shape. I had to clean off some iconography already on the legs, but that was no big deal. I think an improvement here would be to use plasticard instead of cardstock for a smooth surface and prevent the splitting seen along the edge of the cardstock. That and adding a bit more detail to the surface of the armour with one more band of trim.
The trick is to make it look convincing by adding enough detail. I could even match the style of trim up with the chest plate so the design flows down the model.
The feet have had a thin spacer added to them to give the model a tiny bit more height overall. I like this small touch and may start including it on all my termies. It makes their boots look a little more heavy duty.
Overall, I'm going to call this guy a successful test model. There are a number of things I can improve on, but the idea is solid and it can be executed. Now it's time to paint him up. I think I'm go paint him up as a Sons of Horus like Forge World did with their squad.
Here's the finished model.
Make sure to check out these posts as they might help:
How to make Pre-Heresy Terminator Shoulder armour
How to make Pre-Heresy Terminator leg armour
How to make terminator combi-weapons
