Last Updated: Feb 19
One of the last commissions I am finishing up is a Venerable Dark Angels Deathwing dreadnought made of Forge World bits. It's the last project I had hoped to finish before going back to school, but a project like this takes so much time it's crazy.
My hope for this post is to turn it into a mega-post that I can update regularly with my progress over the next few weeks as I steal time here and there to work on it. To that end, it won't be a bunch of smaller posts that go up every week or so, but one big one I'm going to keep adding to since my hobby time is hit and miss now.
A little background on this guy
He is part of the Deathwing squad I did earlier last year. As soon as I finished them, my Client contacted me and asked if I would do a dreadnought to add to the squad. Of course I said yes when he gave me completely free run on the model and told me to build something I thought looked cool and would go with the squad. Who can pass something like that up? Projects like that come along once in a lifetime if you're lucky.
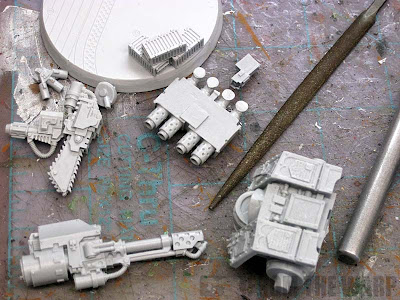
Since I figured he'd be doing Space Hulk clearing work, I opted to load him out with a massive chainfist thing for breaching bulkheads and the like along with an inferno cannon. I can't think of a more terrifying weapon in the confines of a ship than a huge flamethrower. All of the model pieces come from Forge World and the base is from Secret Weapon Minis. It's from the Flight Deck line and is what the squad is on.
I've talked about the bases before and wanting something clean and uncluttered to show off the model. Secret Weapon has two versions of this 60mm base and I chose the one with the crates to break up the huge expanse of base in this particular case and create a little atmosphere for the model. Nothing else will be added to the base aside from the fine surface detail on it already.
Cleaning and Assembly notes:
I managed to get everything cleaned up which took a few days to go over with a fine tooth comb and catch all the mold lines. Then it was a quick bath in warm soapy water to remove any release agent and greasy fingerprints.
Assembly was quick, but repair work took a few days. Things like filling in small gaps here and there and small surface imperfections on the model with greenstuff took an afternoon here and there. I also caught a few more smaller mold lines that I missed the first time around.
I had to bend the inferno cannon slightly to get it straight and ended up cutting out around almost every individual tooth on the chainfist due to flash and excess resin in there. Actual surface imperfections weren't too bad although there were some dimpled surfaces I had to fill out to get level. It seems like the more you look at a model, the more things you find wrong with it. Sometimes I have to take a break after looking at it for so long as things start to blur together and I forget where I'm at.
Do you have any idea how long it took me to figure out where the tiny multi-melta gun goes? I thought it went on his arm somewhere, but I couldn't find it to save my life. I tried attaching that gun to every possible surface of his arm.
It wasn't until I dropped the bit and it landed in between his arm and torso that I figured out it went there. Talk about feeling stupid.
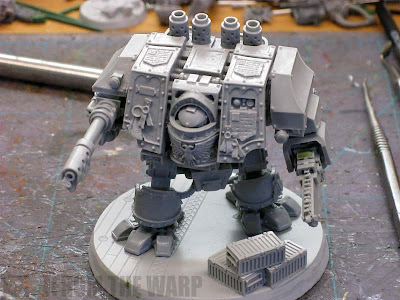
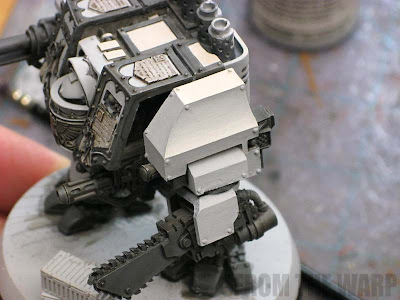
Jan 21: The model has been primed
He's been given a quick coat of light grey primer that will will act in part as the basecoat as well since I'm doing the blended bone color armour on this guy.
He doesn't have much along the lines of actual armour plating. Some small areas on his chest, his leg plates and his shoulder which are the biggest areas. The majority of the work is going to be in the details on this guy. He's covered in detailing that I'm going to have to go in and pull out. That's where the real time will be spent.
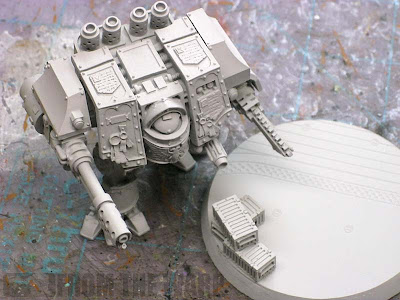
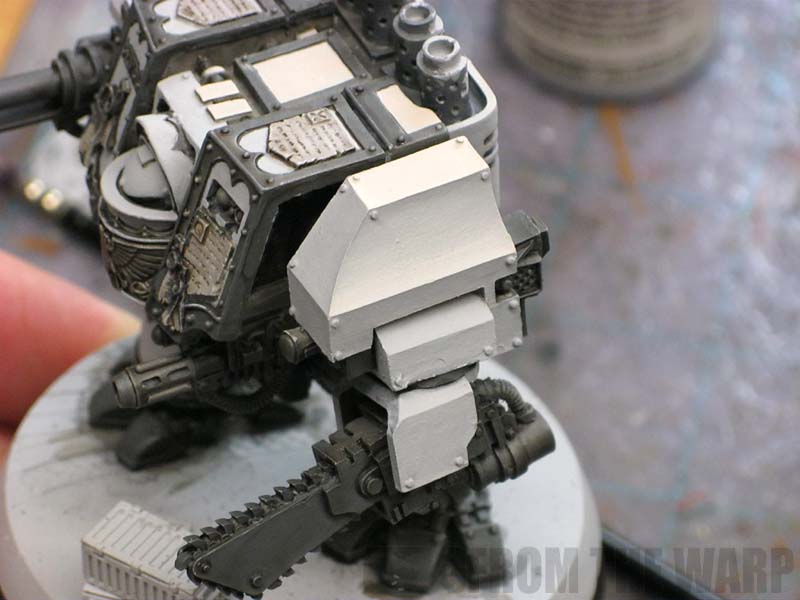
Jan 27: Brass etch and pinned to the base
He's been given a few more small details like some brass etch and has been pinned to his base now. I went back and forth with the pinning or not to before I painted him and I decided to do it in order to make it easy to handle him for the rest of the process.
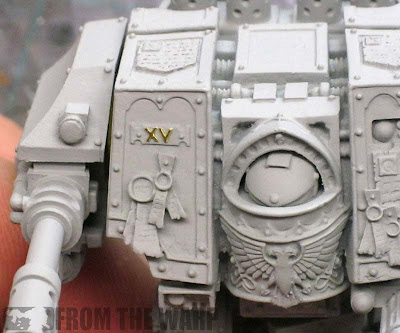
I was torn at first with the brass etch... I wanted to keeping looking around on the model for more places to add it for detail but elected to do it in one place only and add some freehand later on in places that were still left open.
When it came time to pin him to the base, I was left wondering exactly how to do it. The undersides of his feet do not actually touch the base, only the pads of his toes. I decided on pinning each foot as best I could. Since this is more of a display piece, I'm not worried about him breaking away. The pins with the superglue should be more than enough to hold him securely.
Feb 5: Basecoat finished and shading started
This weekend was taken up with some family stuff and writing a paper for my college class. When I did steal a few minutes, I cleaned up the basecoat on this guy and started cutting in for the armour. By that, I mean painting the areas that will be darker later on.
Basically everything that is not bone colored armour.
When I'm done with this step, I'll be giving him a liberal wash of Devlan Mud and then going back in to clean up all the armour plating. After that, it start blending each individual plate from bone to light grey based on a zenith lighting approach.
Feb 17: Model washed and ready for blending
I managed to get the dreadnought washed this week. I know, not much progress, but every little bit helps. I'm hoping to make some big progress this weekend though.
Now that he is washed, all I need to do is go over the armour areas with the light grey color and then painstakingly blend the bone color into that where appropriate.
I'm in the middle of getting the armour completed right now. After I had it washed, it was a matter of going back and cleaning everything up. Then I started the blending. Every single armour plate.

While it took forever, the armour looks amazing when it's blended like this. There's just something about it. With the bone armour done, I've started working up the other portions of the model. The metallics, the gold areas, etc. Once I get all these laid out and base coated, it will be time for some freehand and battle damage.
More coming soon...

One of the last commissions I am finishing up is a Venerable Dark Angels Deathwing dreadnought made of Forge World bits. It's the last project I had hoped to finish before going back to school, but a project like this takes so much time it's crazy.
My hope for this post is to turn it into a mega-post that I can update regularly with my progress over the next few weeks as I steal time here and there to work on it. To that end, it won't be a bunch of smaller posts that go up every week or so, but one big one I'm going to keep adding to since my hobby time is hit and miss now.
A little background on this guy
He is part of the Deathwing squad I did earlier last year. As soon as I finished them, my Client contacted me and asked if I would do a dreadnought to add to the squad. Of course I said yes when he gave me completely free run on the model and told me to build something I thought looked cool and would go with the squad. Who can pass something like that up? Projects like that come along once in a lifetime if you're lucky.
Since I figured he'd be doing Space Hulk clearing work, I opted to load him out with a massive chainfist thing for breaching bulkheads and the like along with an inferno cannon. I can't think of a more terrifying weapon in the confines of a ship than a huge flamethrower. All of the model pieces come from Forge World and the base is from Secret Weapon Minis. It's from the Flight Deck line and is what the squad is on.
I've talked about the bases before and wanting something clean and uncluttered to show off the model. Secret Weapon has two versions of this 60mm base and I chose the one with the crates to break up the huge expanse of base in this particular case and create a little atmosphere for the model. Nothing else will be added to the base aside from the fine surface detail on it already.
Cleaning and Assembly notes:
I managed to get everything cleaned up which took a few days to go over with a fine tooth comb and catch all the mold lines. Then it was a quick bath in warm soapy water to remove any release agent and greasy fingerprints.


Assembly was quick, but repair work took a few days. Things like filling in small gaps here and there and small surface imperfections on the model with greenstuff took an afternoon here and there. I also caught a few more smaller mold lines that I missed the first time around.
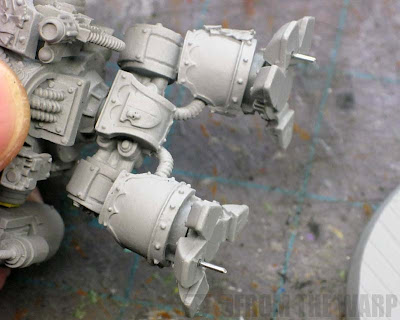
I had to bend the inferno cannon slightly to get it straight and ended up cutting out around almost every individual tooth on the chainfist due to flash and excess resin in there. Actual surface imperfections weren't too bad although there were some dimpled surfaces I had to fill out to get level. It seems like the more you look at a model, the more things you find wrong with it. Sometimes I have to take a break after looking at it for so long as things start to blur together and I forget where I'm at.
Do you have any idea how long it took me to figure out where the tiny multi-melta gun goes? I thought it went on his arm somewhere, but I couldn't find it to save my life. I tried attaching that gun to every possible surface of his arm.
It wasn't until I dropped the bit and it landed in between his arm and torso that I figured out it went there. Talk about feeling stupid.
Jan 21: The model has been primed
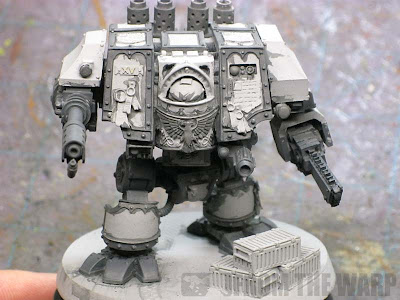
He's been given a quick coat of light grey primer that will will act in part as the basecoat as well since I'm doing the blended bone color armour on this guy.

He doesn't have much along the lines of actual armour plating. Some small areas on his chest, his leg plates and his shoulder which are the biggest areas. The majority of the work is going to be in the details on this guy. He's covered in detailing that I'm going to have to go in and pull out. That's where the real time will be spent.
Jan 27: Brass etch and pinned to the base
He's been given a few more small details like some brass etch and has been pinned to his base now. I went back and forth with the pinning or not to before I painted him and I decided to do it in order to make it easy to handle him for the rest of the process.

I was torn at first with the brass etch... I wanted to keeping looking around on the model for more places to add it for detail but elected to do it in one place only and add some freehand later on in places that were still left open.

When it came time to pin him to the base, I was left wondering exactly how to do it. The undersides of his feet do not actually touch the base, only the pads of his toes. I decided on pinning each foot as best I could. Since this is more of a display piece, I'm not worried about him breaking away. The pins with the superglue should be more than enough to hold him securely.
Feb 5: Basecoat finished and shading started
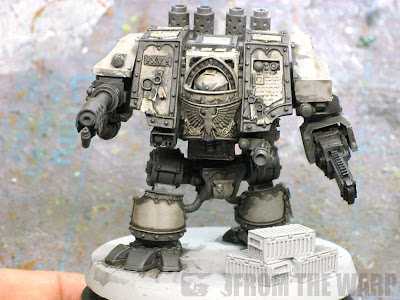
This weekend was taken up with some family stuff and writing a paper for my college class. When I did steal a few minutes, I cleaned up the basecoat on this guy and started cutting in for the armour. By that, I mean painting the areas that will be darker later on.
Basically everything that is not bone colored armour.

When I'm done with this step, I'll be giving him a liberal wash of Devlan Mud and then going back in to clean up all the armour plating. After that, it start blending each individual plate from bone to light grey based on a zenith lighting approach.
Feb 17: Model washed and ready for blending
I managed to get the dreadnought washed this week. I know, not much progress, but every little bit helps. I'm hoping to make some big progress this weekend though.

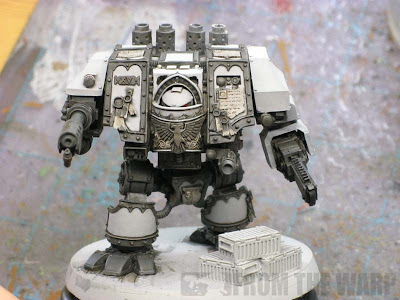
Now that he is washed, all I need to do is go over the armour areas with the light grey color and then painstakingly blend the bone color into that where appropriate.
| Feb 19: Basecoats and blending |
I'm in the middle of getting the armour completed right now. After I had it washed, it was a matter of going back and cleaning everything up. Then I started the blending. Every single armour plate.

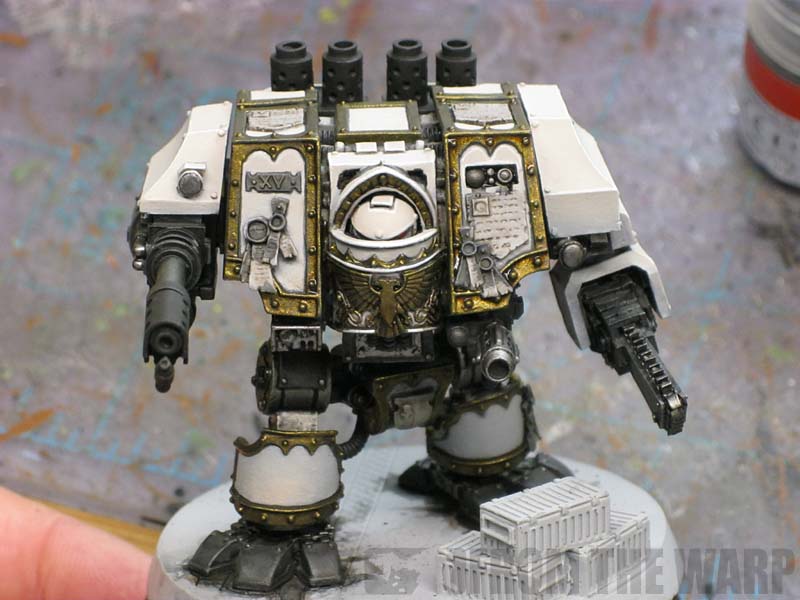
While it took forever, the armour looks amazing when it's blended like this. There's just something about it. With the bone armour done, I've started working up the other portions of the model. The metallics, the gold areas, etc. Once I get all these laid out and base coated, it will be time for some freehand and battle damage.
More coming soon...