
It's not that it's a ton of info, it was just taking me forever to break it down into manageable sections.
That being said, here's the last part of the painting (to include the weathering) and the final construction of the drop pod.
We left off with the center console and the inside of the drop pod painted up. Now it's time to move on.
Painting the outside of the drop pod
With the inside done, it's time to move to the outside of the ramps and the underside of the engine. Again we clean up around the edges where we did our hazard stripes and any spots we may have missed when we primed the model.
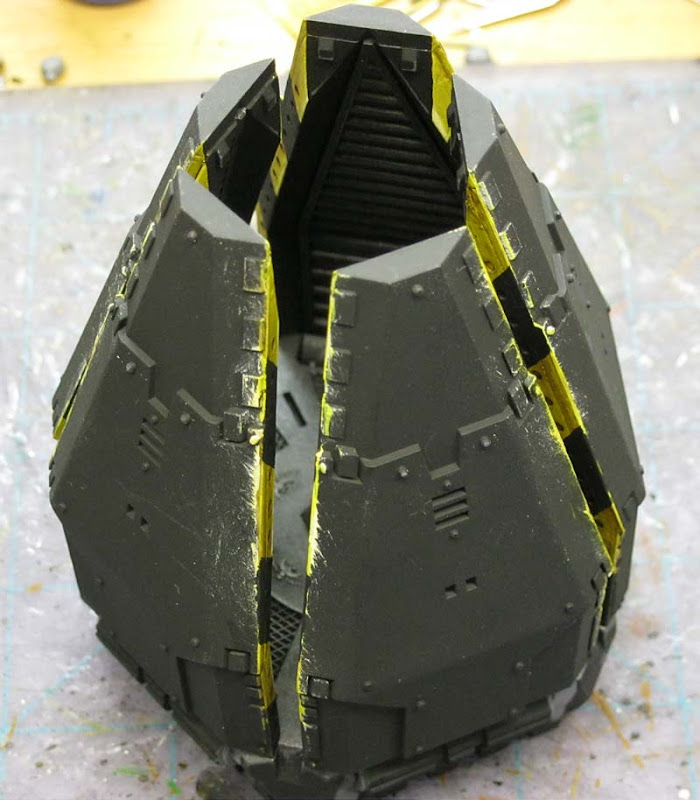
You won't need to do much line highlighting towards the bottom of the pod if you plan on adding atmospheric entry damage like I'll be doing.
You can see I've left the icons off the doors at this point.
The next step once we clean everything up and add our few line highlights is to make our Chapter specific icon for the Sergeant door and glue the Imperial Eagles to the remaining doors.
Creating your chapter specific door icon
You'll need to find an image of the Chapter icon for the chapter you'll be using. It shouldn't be tough as most all of them are out there in the internet in some fashion or another. If you are using a DIY chapter, it's no problem, you'll just need a drawing of your logo.
Once you have your logo, the first step is to scale it down so it will fit in the space provided on the outside of the pod door. There's not much room there, so you want to make sure of two things.
1. Your symbol fits.
2. You leave some room around the edges so it doesn't look cramped.
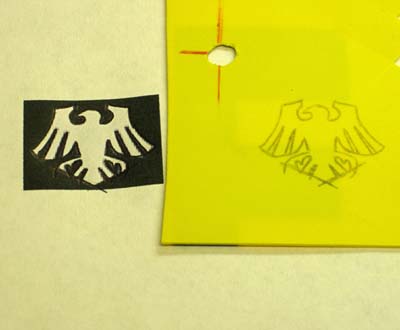
Once you have it the correct size, print it out if you haven't already. We'll be transferring the image you printed out (which is the correct size) to a piece of plasticard. For the plasticard, I'm using a plastic sign I picked up from a local hardware store. It's the right thickness for the look I want.
Take your printed out symbol and using a pencil, color the back side of the symbol completely. You want a good, solid layer of graphite on the back.
Carefully place your drawing on top of your plasticard and using a ball point pen, trace the outside edges of your symbol being careful not to move it while tracing the edges. The end result should be what you see above, a line drawing (in the correct size) of your symbol on the plasticard.

Start with a brand new blade on your knife. This is a detailed piece and you don't want an old blade ruining your work so far.
I cut the outside edges first and then each interior cut is made at the center and cut outward. Things like the slots between each wing are started up next to the body and I pull my blade away from the center of the symbol.
Once you have the whole thing cut out, you can glue it in place on your door. A bit of superglue is all it takes. To complete the effect, I added a few small rivets to the corners of the symbol to make it appear as though it is bolted in place.
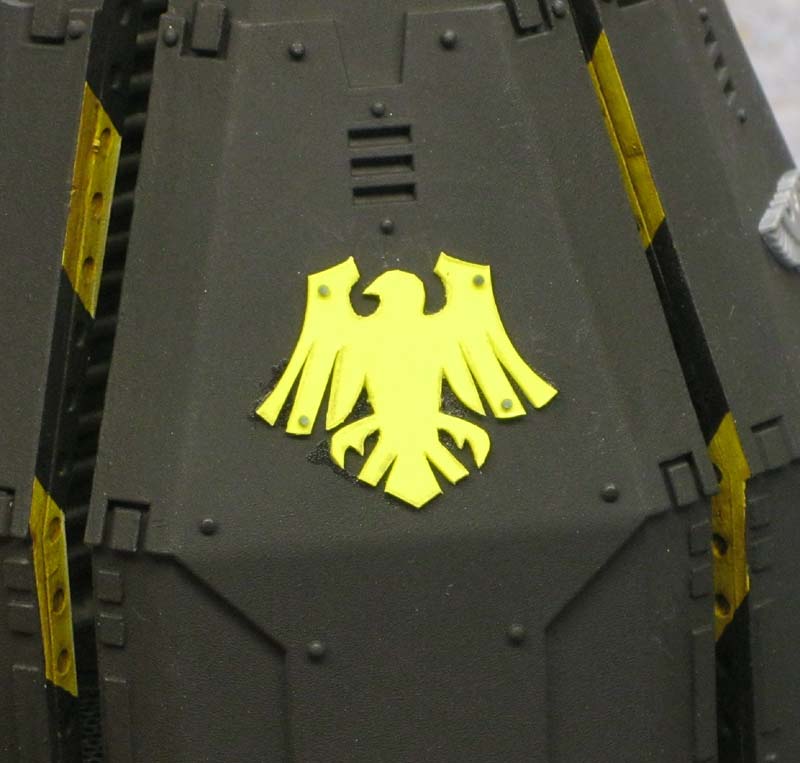
The rivets are made by rolling out a tiny roll of greenstuff and letting it cure. Then small chunks are cut off the end and glued in place where a rivet might look like it belongs. The key here is to use a tiny amount of superglue so you don't obscure the detail and shape of the rivet.

The Raven Guard symbol starts out as a dark grey basecoat followed by light grey and then white along the upper edges for effect.
Looking at the picture now, I can see all the detail is washed out and I apologize for that.
A small dab of thinned black around each rivet creates the shadow and a touch of silver on top each one completes the look.
The Imperial Eagles are painted gold to give the pod some additional contrast. They are based with P3 Blighted Gold, drybrushed lightly with silver and then washed with GW Sepia all over and then Devlan Mud in the deep recesses only.
Painting the interior weapons
While waiting for other pieces to dry, I took my two weapons and glued them to bits of sprue so that I could paint them. Once they're dry, break off the sprue and clean up the attachment point.

The same techniques are applied to the weapons that are used on the rest of the drop pod. The metallics are treated the same and the black is line highlighted the same way as well. I added a bit of color to them to make them stand out and break up all the metal on the inside of the pod.
Assembling the drop pod
With all of our pieces painted to this point, we can assemble the pod and do the last few steps of weathering.

Remember when you marked the individual pieces as you took them all apart after the initial construction? This is when that matters. We want everything to line back up nice and snug like it did the first time it was built.
I used simple dots to line up my interior with my fins. You can barely see them in the picture above, but they're there enough that I can still find them and get everything back together in the right position.
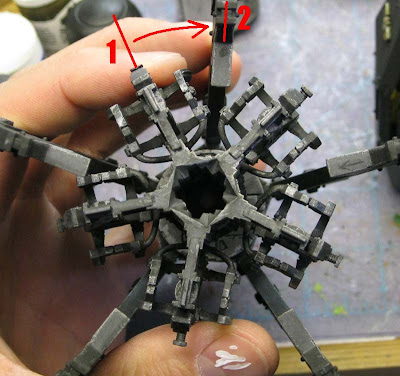
In order to get the center console into the stabilizing fins, you have to rotate it slightly. The trick is to make sure you line up the two dots on each piece. That way, when you rotate the center console (from Position 1 to Position 2) both dots line up and you're all set.
As you rotate the center console into position make sure you get all the cables lined up properly into the slots on the inside of the fins.

Once you have the center console and the fins together, you can set them in place on your base. Again, make sure you line up your center with your drop pod base so that it all fits nice and snug. You'll need to glue the console into the fins before gluing the combined piece onto the drop pod floor.
With all of it glued, set it aside for a few minutes to let everything dry. You don't want to damage your model at this point because you were in a rush to get the last bit done.
Adding the final weathering and touches
The last few things to do are weathering related. A few spots on the inside of the pod and the entry damage on the outside of the pod.

You can see where I add the final shading with a wash of GW Badab Black to the point where the center console joins the drop pod floor and where I added a simple highlight to the outer edges of the floor.

This thing shoots into the atmosphere of all kinds of planets and sustains considerable damage in the process.
I started by painting the engine underneath and the bottom portion a gunmetal color. This is followed by a very delicate drybrush of dark brown along the upper edges of the entry damage.
This starts at the bottom of the pod and extends no higher than half way up the side of the door. Remember to keep all your brush strokes perpendicular to the base of the pod. You don't want any strokes going in odd directions... it will kill the effect of the entry damage being done in a certain fashion.
That is followed with a drybrush of the gunmetal, but not as high up as the brown color went. This will give the effect of the damage getting worse the closer you get to the bottom of the pod.
After that, the whole area is given a slightly thinned wash of GW Badab Black to mute the brown color and provide some contrast to the gunmetal areas.
The finished drop pod
The entry weathering is the last step in this whole thing. At this point, you should have a completed drop pod that wasn't too hard to assemble or paint. These models are complex and can take some time to do right, but they're definitely worth it in the end.

