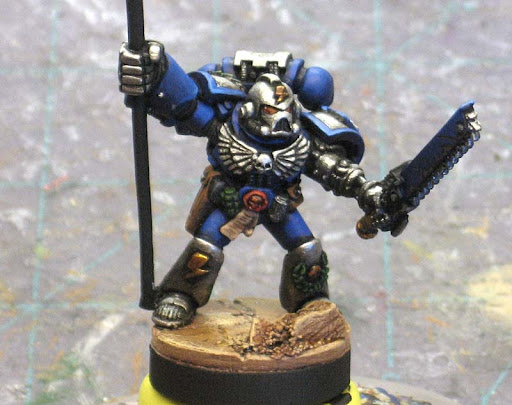
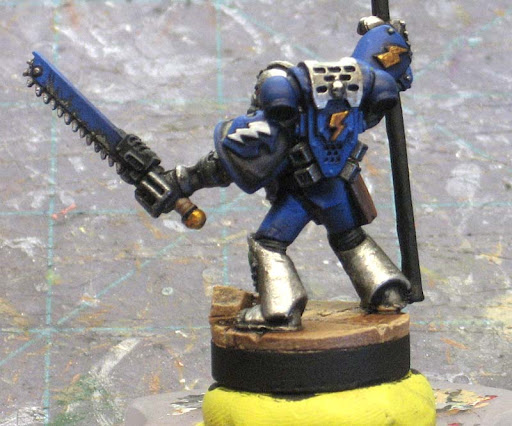
Here he is, the banner bearer himself. You can click on the images above for larger versions. I know it might seem odd, but I paint the model completely, paint the banner completely and then assemble the two parts in the end. I'm not just teasing you all by leaving the banner off.
In a previous post, there was a comment from Sweet Dreams asking about the backpack and getting it attached. The way the model here is posed, his shoulderpads prevent his backpack from sitting flush against his back like it should when attached properly.
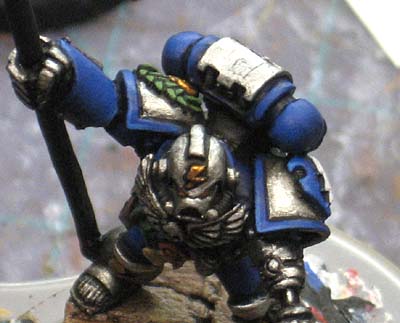
To fix this, since I didn't have the option of leaving it off or not doing the model all together, was to use a bit of greenstuff.
At first, I dug through my bits box and tried a couple of different backpacks. Didn't matter what I grabbed, none of them fit correctly. In the end, I went with the one I picked out originally because I'd already sculpted an icon on it and the mold lines were cleaned off. That's right folks, I am that lazy.
All I needed to do was add a small block of greenstuff to the back of the model prior to placing the backpack in position. I put it on the model, used the sculpting tool to square it up and then added some superglue to the backpack itself and pressed everything together. Where the greenstuff was pushed out of shape, I simply squared it back up with the tip of my sculpting tool. It didn't have to be perfect, just enough to sell the illusion (you've heard that before here).
Once dry, I left it black so that it dropped out of sight and wasn't very pronounced on the model. Now it blends in, doesn't draw attention and looks "right."
Additional related links:
Repositioning Space Marine arms
Space Marine backpack conversion
