I got an email from a reader the other day asking "how" I did the wing conversion to the Forge World Daemon Prince I did a while back. How did I attach the wings together and then attach them to the body?
Thanks for the good question.
Here's a little more in-depth explanation of how I did it.
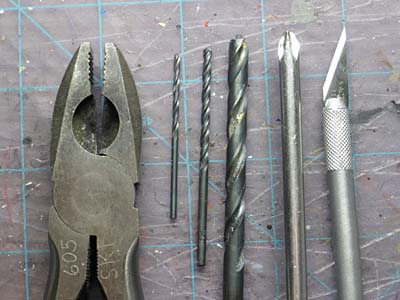
First you'll need some tools:
X-Acto knife
Cordless Drill with assortment of bits
Scewdriver and assorted flat head screws (must be flat head)
Superglue
Wire snips
Paperclips or thin metal rod (for pinning)
Magnet (various sizes but larger is better here)
Greenstuff and sculpting tools
The model getting the wings and the wings themselves
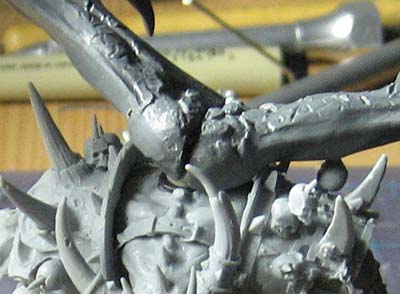
The first thing I did was trim away some of the wings to make them fit together better. They flared out at the bottom so I trimmed that away and I cleaned up the inside edge where the wings would have attached to their intended model.
Then I drilled two holes in each wing and double pinned them together. I use superglue to hold the pins in place. Once dry, I bent the joint so I had the wings in the position I wanted.
Then I set them on the model in the location I wanted them to be. This gave me the point where I would add the screw to the torso. I'll come back to the magnet in the wings later on.
Using a small drill bit, I made a pilot hole and then kept redrilling it with a larger bit until I had a diameter slightly smaller than the screw so the threads would grip. Not so small that adding the screw would split the model though.
The reason I use a screw and a magnet instead of two magnets is for ease of installation and adjustment. Two magnets will pull on each other and one may come out eventually... and there's no adjustment. With the screw, I can back it out if needed to make contact with the magnet and get a good connection. And the screw isn't going to come out either.
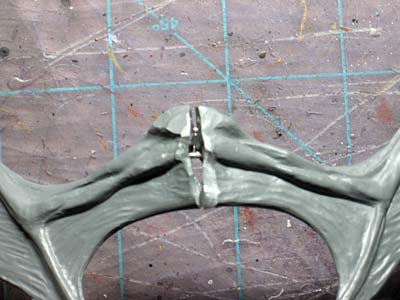
A note about the magnet... you need a magnet that has enough surface area contact with the screw (it's flat head remember). This is important because you don't want the weight of the wings to break the connection. Use too small of a magnet with too little surface area and the connection won't stay. The pic below shows the connection before any greenstuff was added.
As for installing the magnet in the wings, all I did was place the wings back in position where I wanted them on the model and I eyeballed the location for the magnet. Then I flipped the wings over and drilled a hole on the underside (in the gap between the wings) that was the same size as the magnet I was going to use and the fit the magnet into it snugly. A little superglue to hold it in place and it was done.
Any corrections were made by adjusting the screw so that the magnet and the screw met and their surfaces contacted completely.
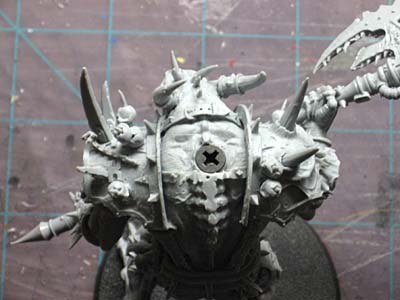
Then it was just a matter of using greenstuff to build up the area and fill in all the gaps. Remember, this part takes time and I work in sections, I never try to do it all at once. I think it took me four sessions to get it all done.
And one more thing, it can be a little unnerving to get out your cordless drill and start in on your very expensive model. I get around this by only doing it to other peoples models. Seriously though, take your time and plan out what you're going to do and you'll be fine.
Check out the original Daemon Prince Project
